10 Dollar Store DIY Ideas

Dollar store DIY projects prove that attractive home decor and practical organization do not require a large budget. With a little creativity and careful planning, inexpensive everyday items can be transformed into stylish decorations, storage solutions, and functional accessories for every room in the home. These projects are especially popular because they use affordable materials while allowing complete customization to match different decorating styles, from modern design to farmhouse and minimalist interiors. This Pinterest-style guide introduces ten beginner-friendly Dollar Store DIY ideas that are simple to create using basic tools and common craft supplies. You will also learn how to prepare materials, organize your workspace, avoid common crafting mistakes, and style finished projects for the best visual impact. Every project focuses on practical value, realistic construction, and long-lasting results that fit beautifully into everyday living spaces.
Why Dollar Store DIY Projects Are Trending
Dollar Store DIY projects continue to rank among the most popular Pinterest ideas because they combine affordability with creativity. Many people enjoy decorating their homes without spending large amounts of money, making low-cost materials an attractive starting point for handmade projects. Simple household items such as baskets, picture frames, glass jars, mirrors, trays, and storage bins can easily be upgraded with paint, rope, wood accents, or decorative paper. Most projects require only basic crafting skills, making them ideal for beginners who want easy project ideas with professional-looking results. These tutorials also encourage recycling and creative reuse, reducing unnecessary waste while improving home organization. The combination of budget ideas, personalized decoration, and practical function explains why Dollar Store DIY inspiration continues to attract homeowners, renters, and craft enthusiasts looking for stylish yet affordable solutions.
Materials and Preparation
Preparing your materials before starting helps every DIY project progress smoothly. Gather dollar store baskets, glass jars, mirrors, plastic containers, wooden signs, trays, candles, rope, faux greenery, picture frames, adhesive hooks, decorative paper, acrylic paint, paintbrushes, hot glue gun, glue sticks, scissors, ruler, measuring tape, sandpaper, craft knife, and protective newspaper for your workspace. Decide on a consistent color palette before decorating so the finished pieces coordinate with your existing home decor. Measure shelves, tables, or wall spaces where each project will be displayed to ensure the correct size. Clean all purchased items thoroughly before painting or gluing to improve adhesion and durability. Organizing your materials and tools in advance reduces interruptions and helps produce cleaner, more polished handmade results throughout each creative project.
Decorative Rope Storage Basket
How to Create
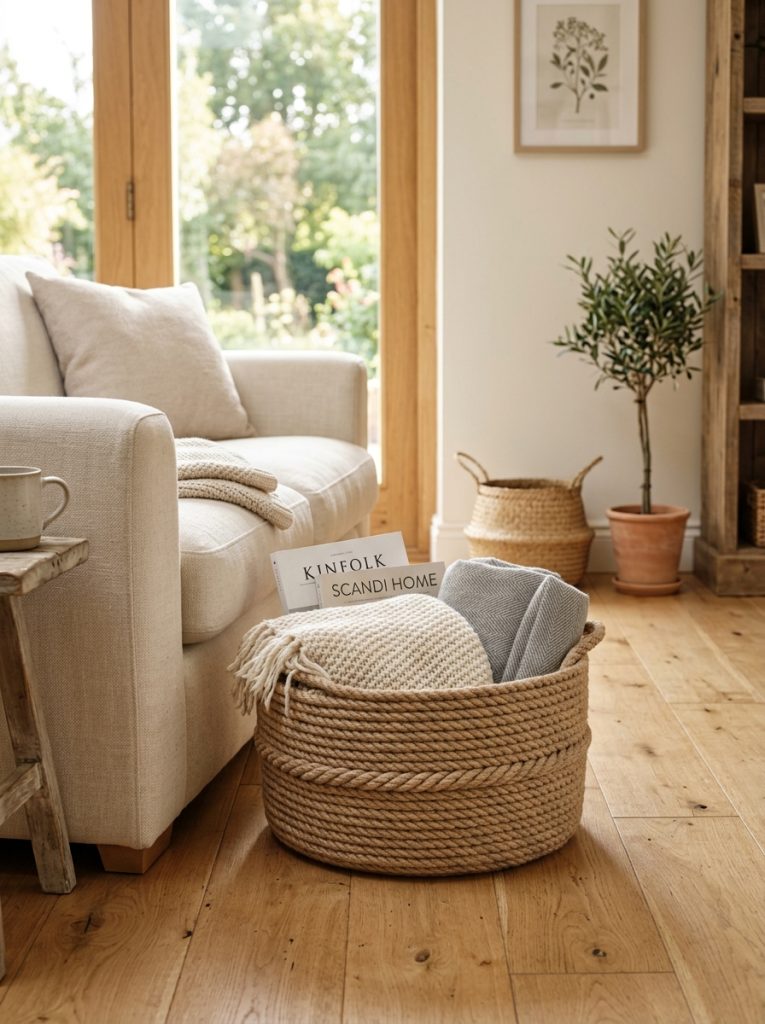
Transform an inexpensive plastic basket into an attractive woven-style storage container using cotton rope and hot glue. Begin by cleaning the basket and allowing it to dry completely. Starting from the bottom edge, wrap rope tightly around the basket while securing it with small amounts of glue every few inches. Continue upward until the entire surface is covered. Leave the handles exposed or wrap them with matching rope for a consistent appearance. Once finished, use the basket to organize blankets, magazines, toys, or bathroom towels. Neutral rope colors blend well with modern design and minimalist style interiors while adding natural texture to the room. This beginner-friendly project improves organization while creating a decorative storage solution that looks significantly more expensive than the original materials.

Farmhouse Glass Vase Makeover
Step-by-Step Guide
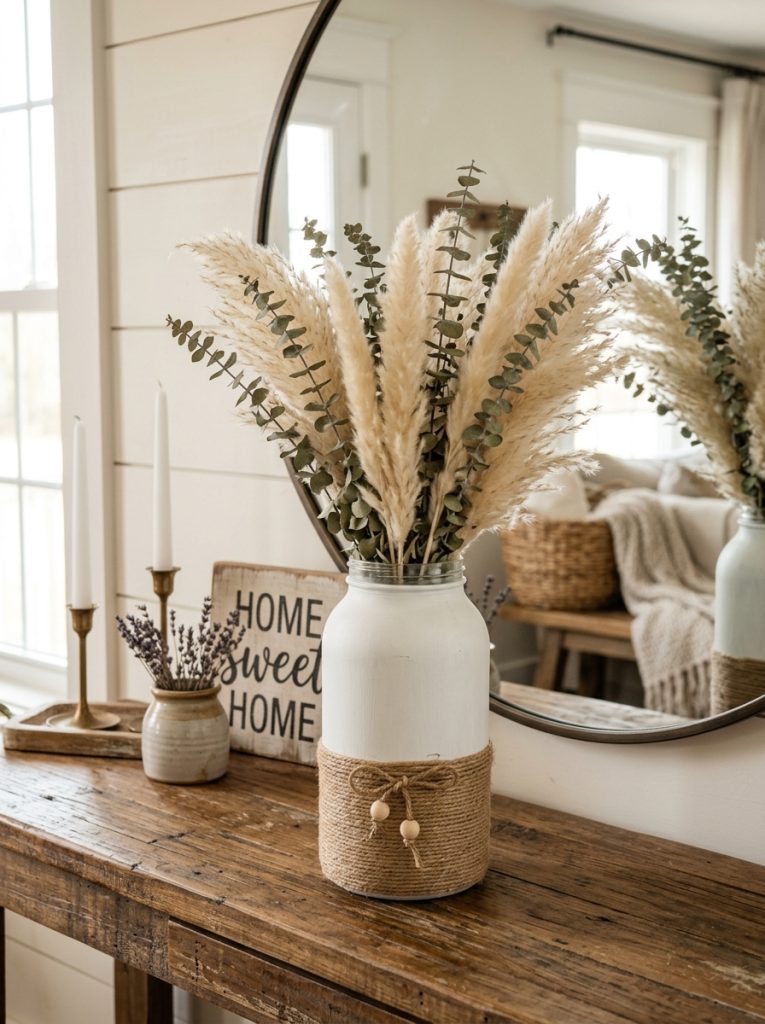
Convert a simple glass vase into elegant farmhouse-inspired home decor using paint and natural textures. Clean the vase thoroughly before applying thin coats of matte acrylic paint to the exterior. Allow each layer to dry before adding another coat for an even finish. Wrap natural jute twine around the neck of the vase and secure it neatly with hot glue. Fill the finished vase with dried flowers, pampas grass, eucalyptus stems, or seasonal branches for a timeless display. Position the vase on dining tables, entry consoles, or floating shelves alongside candles and ceramic accessories. This easy project requires only a few inexpensive materials while creating a handmade decorative piece suitable for many interior styles.
Framed Wall Organizer
How to Make
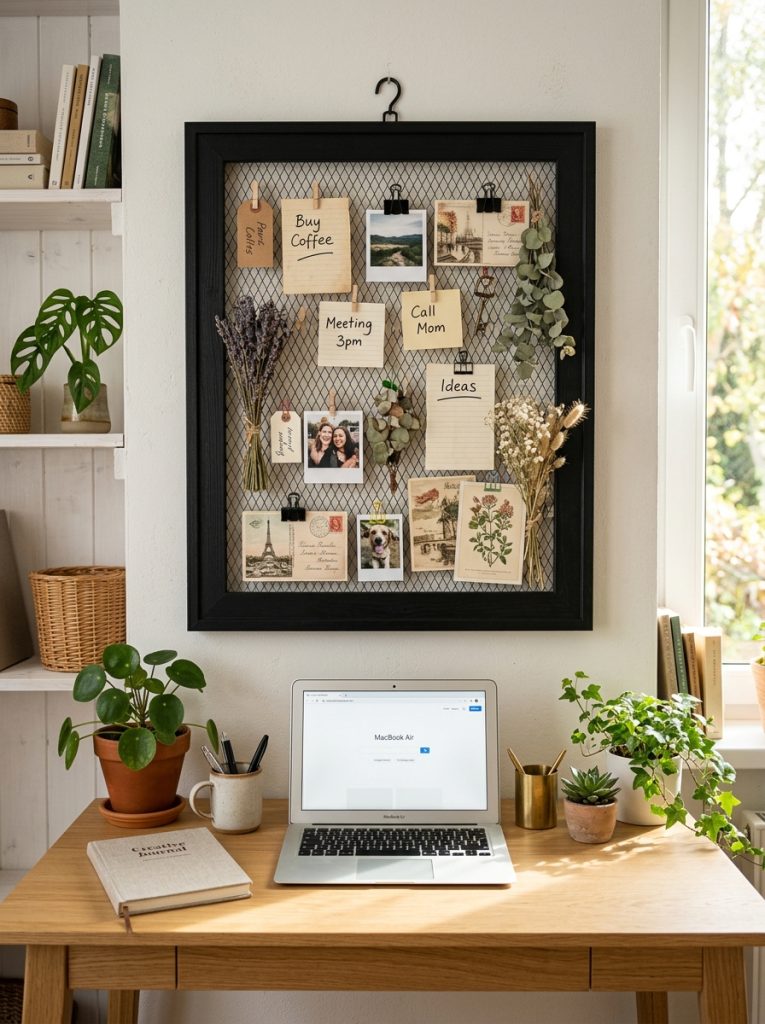
Create a practical wall organizer using an inexpensive picture frame combined with wire mesh or decorative ribbon. Remove the original artwork from the frame and replace it with metal mesh, corkboard, or tightly stretched ribbon arranged in a crisscross pattern. Secure everything firmly before repainting the frame in a color that complements your home decor. Attach decorative clips to hold photographs, notes, shopping lists, or inspirational quotes. Install the organizer near an entryway, home office, or kitchen using removable wall hooks. This creative project combines organization with decoration while helping keep important reminders visible. Coordinating the frame with nearby furniture creates a polished appearance that integrates naturally into the room.
Wooden Tray Coffee Table Centerpiece
Setup Method
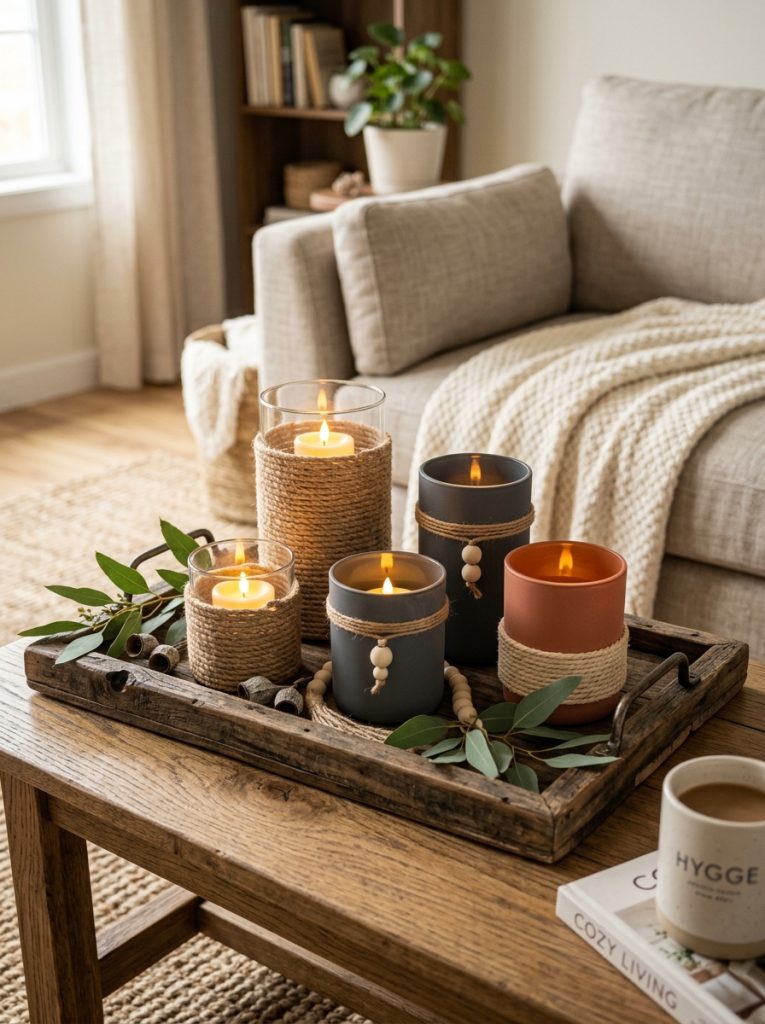
Upgrade a simple plastic or wooden serving tray into a stylish coffee table centerpiece. Paint the tray in a neutral shade before lightly distressing the edges for subtle texture if desired. Add decorative handles using inexpensive hardware and allow the finish to dry completely before styling. Arrange candles, small potted plants, ceramic vases, books, or decorative beads inside the tray while leaving enough open space to maintain balance. The tray helps organize decorative accessories while preventing clutter on tables. This beginner-friendly project creates a versatile display that can be updated seasonally by replacing small decorative items. Careful arrangement of different object heights adds visual interest without overcrowding the space.

Faux Greenery Wall Basket
Execution Process
Transform a basic wire or woven basket into a decorative wall accent filled with artificial greenery. Paint the basket if necessary to coordinate with your room’s color palette before attaching lightweight faux leaves, eucalyptus stems, or seasonal flowers inside floral foam. Arrange the greenery to create a full yet natural appearance, allowing some stems to extend gently beyond the basket edges. Hang the completed decoration in an entryway, hallway, or above a console table using secure wall hooks. Combining greenery with woven textures introduces warmth while complementing farmhouse and modern home decor. This project uses inexpensive materials to create an attractive focal point that requires no ongoing maintenance.

Decorative Candle Holder Set
How to Create
Create a coordinated candle holder collection using inexpensive glass containers from the dollar store. Paint the lower portions with matte finishes or wrap sections in natural rope for additional texture. Leave portions of the glass exposed to reflect candlelight beautifully. Place battery-operated candles inside for safe indoor decoration. Arrange several finished holders together on trays, shelves, or dining tables using different heights to create visual balance. Add decorative stones, moss, or seasonal accents around the base without overcrowding the display. This DIY tutorial produces elegant home decor suitable for everyday use while requiring only simple crafting techniques and affordable materials.
Floating Bathroom Shelf Organizer
Step-by-Step Guide
Combine inexpensive storage bins and lightweight shelves to create an organized bathroom display. Paint wooden shelf boards if needed before securely mounting them to the wall. Place matching dollar store baskets or containers on each shelf to organize toiletries, rolled towels, soaps, and personal care items. Label each basket using decorative tags for improved organization. Add a small plant or candle to soften the overall appearance while maintaining functionality. This project maximizes vertical storage space while creating a clean, coordinated bathroom design. Consistent container colors help achieve a minimalist style that feels organized rather than cluttered.

Decorative Mirror Upgrade
How to Make
Refresh a plain dollar store mirror by creating a larger decorative frame using wood trim, rope, or craft sticks. Measure carefully before attaching the frame pieces with strong adhesive. Paint or stain the completed frame to match surrounding furniture, allowing adequate drying time between coats. Once finished, hang the mirror in an entryway, hallway, bedroom, or bathroom where it reflects natural light and visually expands the room. Decorative framing transforms a simple mirror into an attractive statement piece while remaining budget friendly. This beginner-friendly project demonstrates how inexpensive materials can create sophisticated home decor through careful planning and neat assembly.
Tiered Storage Stand
Execution Process
Build a tiered organizer using inexpensive serving plates and candle holders secured together with strong adhesive. Begin by cleaning every surface before assembling the structure from largest plate on the bottom to smallest plate on top. Ensure each level is centered and balanced before allowing the adhesive to cure completely. Use the finished stand to organize jewelry, cosmetics, snacks, office supplies, or seasonal decorations. Coordinated paint finishes help create a cohesive appearance while decorative edging adds subtle detail. This practical project combines organization with elegant presentation and works well on bathroom counters, kitchen islands, or bedroom dressers.

Decorative Mason Jar Organizer
How to Create
Turn simple glass jars into attractive organizers for craft supplies, kitchen utensils, office tools, or bathroom essentials. Paint the lids with coordinating colors before attaching decorative labels for easy identification. Mount several jars beneath a wooden shelf or arrange them neatly on open shelving according to their intended purpose. Fill the jars with frequently used items while maintaining consistent spacing for a tidy appearance. Optional rope accents or wooden tags add natural texture without overwhelming the design. This easy project improves organization while introducing attractive handmade decoration into multiple rooms throughout the home. Clear glass also allows contents to remain visible for everyday convenience.

Common Beginner Mistakes and How to Avoid Them
One of the most common mistakes in Dollar Store DIY projects is rushing through preparation. Always clean plastic, glass, and metal surfaces before painting or gluing because dust and oils reduce adhesion. Another frequent issue is applying thick paint coats, which often create uneven finishes and visible brush marks. Thin, even layers produce smoother results. Beginners should also avoid overcrowding decorative displays with too many accessories. Leaving open space creates a cleaner and more balanced appearance. Measure project areas before purchasing materials to prevent sizing problems. Organizing tools and supplies before beginning reduces interruptions and improves efficiency. Careful preparation consistently leads to stronger construction, better durability, and more professional-looking handmade decorations.
Practical Tips for Better Results
Select materials in similar colors and textures to create coordinated home decor across multiple projects. Test paint colors on small sections before completing an entire item to ensure they match your decorating style. Use high-quality adhesive when joining heavier materials to improve long-term durability. Allow paint and glue to cure fully before styling or displaying finished pieces. Keep leftover rope, ribbon, wood scraps, and decorative hardware organized because they are useful for future creative ideas. Photograph completed projects in natural daylight to evaluate their overall presentation before placing them permanently. Small finishing details often create the greatest improvement in the final appearance.
Styling, Presentation, and Organization Ideas
Display Dollar Store DIY projects in coordinated groups rather than scattering them throughout the room. Pair woven baskets with glass vases, candles, greenery, and wooden trays to create balanced decorative arrangements. Keep color palettes simple by using neutral tones accented with natural textures such as rope, wood, linen, or ceramic finishes. Organize storage containers consistently by matching labels, baskets, and decorative accessories. Mixing functional items with decorative elements helps maintain attractive yet practical living spaces. Thoughtful styling allows inexpensive handmade projects to blend naturally with modern home decor while creating an organized and welcoming environment.
Budget and Time Planning
Dollar Store DIY projects are ideal for anyone decorating on a limited budget because many materials are inexpensive and readily available. Begin with projects that provide both decoration and practical storage before expanding into purely decorative accessories. Purchasing versatile supplies such as rope, paint, and glue in larger quantities often reduces costs across multiple projects. Divide larger builds into stages that include preparation, painting, assembly, drying, and styling to improve overall quality. Store reusable materials carefully after each project to reduce future expenses and simplify planning. Organized budgeting and realistic scheduling make it possible to complete several creative projects without exceeding financial limits.
Creative Expansion and Advanced Inspiration
After completing these beginner-friendly Dollar Store DIY ideas, experiment with combining multiple materials to create larger decorative pieces. Build coordinated collections featuring matching baskets, trays, candle holders, and storage containers to establish visual consistency throughout your home. Seasonal decorations can be introduced by replacing greenery, decorative fillers, or color accents while preserving the core project structure. Save measurements, templates, and successful color combinations for future tutorials to simplify new projects. Continued experimentation strengthens crafting skills while encouraging original Pinterest ideas that combine organization, home decor, modern design, and affordable handmade creativity into every room.