10 Air Dry Clay Projects Ideas

Air dry clay projects have become one of the most popular Pinterest ideas because they combine creativity with simplicity. Unlike traditional clay that requires kiln firing, air dry clay hardens naturally, making it suitable for beginners and experienced crafters alike. These DIY projects offer an accessible way to create handmade decorations, practical home decor, and personalized gifts using basic materials and simple techniques. This tutorial introduces ten creative ideas that can be completed with careful planning and a step-by-step approach. Each project focuses on realistic methods that require minimal equipment while producing attractive results. Readers will learn how to prepare their workspace, choose suitable materials, shape clay successfully, and finish each project with a clean appearance. Whether creating decorative accessories or functional household items, these ideas provide inspiration for enjoyable creative projects that fit different skill levels, budgets, and modern design preferences.
Why These Air Dry Clay Projects Are Trending
Air dry clay continues to gain attention because it allows anyone to create attractive handmade pieces without specialized equipment. Many Pinterest ideas highlight minimalist style, natural textures, and personalized decoration, making clay projects an excellent choice for modern DIY enthusiasts. These projects are beginner friendly because they use simple tools and require only basic shaping techniques. They also encourage creativity by allowing unlimited customization through different forms, textures, and finishes. Home decor trends increasingly feature handcrafted items that add warmth and individuality to living spaces. Air dry clay supports this aesthetic while remaining affordable and widely accessible. Many projects can be completed during a weekend, making them practical for busy schedules. Their flexibility allows creators to experiment with organization accessories, decorative accents, and artistic displays that complement contemporary interiors while developing useful crafting skills through a structured step by step process.
Materials and Preparation
Successful air dry clay projects begin with proper preparation and organized materials. Gather air dry clay, a smooth rolling surface, a rolling pin, a craft knife, fine sandpaper, water, a small sponge, sculpting tools, texture stamps, rulers, baking paper, acrylic paint if desired, paintbrushes, and a protective finish suitable for decorative pieces. Prepare a clean workspace that provides enough room for shaping and drying. Cover the table to simplify cleanup and prevent clay from sticking. Before beginning any creative project, decide on the size, design, and purpose of each item. Sketching a simple outline helps maintain consistent proportions during shaping. Keep a small container of water nearby to smooth rough edges without soaking the clay. Careful planning reduces mistakes, improves organization, and creates a more enjoyable crafting experience from start to finish.
Idea 1: Elegant Minimalist Trinket Dish
How to Create
A minimalist trinket dish is one of the easiest air dry clay projects because it combines simple shaping with practical everyday use. Begin by rolling the clay into an even sheet with consistent thickness. Use a round bowl or circular template to cut a clean shape before gently lifting the edges over a small bowl to create a shallow curved form. Smooth fingerprints using slightly damp fingertips and refine the edges with sculpting tools for a polished appearance. Allow the dish to dry completely on a flat surface before lightly sanding any uneven areas. Decorative textures can be added by pressing lace, leaves, or fabric into the clay before drying. Once hardened, paint the dish in neutral colors that complement modern design or leave the natural clay exposed for a minimalist style. The finished piece serves as attractive home decor while organizing jewelry, keys, coins, or other small accessories.
Idea 2: Handmade Decorative Candle Holder
Step-by-Step Guide
A decorative candle holder provides both aesthetic value and creative satisfaction while showcasing the natural texture of air dry clay. Roll the clay into a thick slab before wrapping it around a cylindrical template that matches the desired candle size. Carefully join the seam by blending the clay until it becomes nearly invisible. Add subtle geometric patterns, carved lines, or stamped textures to increase visual interest without making the design overly complex. Ensure the opening remains large enough for a suitable candle insert while maintaining stable walls. Allow the holder to dry slowly to reduce the chance of cracking. After drying, smooth rough surfaces with fine sandpaper and apply a decorative finish if preferred. This DIY project fits modern home decor because it emphasizes clean forms, handmade character, and functional decoration. It also serves as an excellent beginner friendly exercise for improving shaping and surface finishing techniques.

Idea 3: Personalized Clay Plant Markers
How to Make
Clay plant markers combine organization with decorative appeal, making them useful for indoor gardens and outdoor containers. Roll the clay into a flat sheet and cut long rectangular strips with rounded ends to create comfortable handles. Press plant names into the surface using alphabet stamps, carving tools, or careful hand lettering before the clay begins to harden. Decorative borders, botanical patterns, or simple leaf impressions can be added around the text for additional character. Allow each marker to dry on a perfectly flat surface to prevent bending. After drying, lightly sand the edges for a smoother finish before applying paint or leaving the natural surface visible. These handmade markers improve organization while adding a personalized touch to plant displays. They also provide an enjoyable creative project that introduces beginners to lettering, surface decoration, and consistent shaping using simple materials and careful planning.
Idea 4: Modern Textured Wall Hanging
Execution Process
A textured wall hanging transforms simple air dry clay into striking decorative artwork suitable for modern interiors. Begin by rolling the clay into several geometric shapes such as circles, arches, or rectangles. Create visual texture using fabric, leaves, carved lines, or patterned rollers before cutting the final forms. Punch hanging holes near the top while the clay remains soft. Arrange the shapes in a balanced composition that includes different sizes for visual movement. Allow every piece to dry completely before sanding rough edges and assembling them with cotton cord or decorative string. The finished arrangement creates layered decoration that reflects minimalist style while remaining lightweight and easy to display. This project encourages experimentation with pattern, spacing, and proportion while developing practical skills related to planning, organization, and surface finishing. It offers creative inspiration for anyone interested in handmade wall decor.
Idea 5: Decorative Coaster Set
Setup Method
Creating a coordinated coaster set is an easy project that combines functionality with decorative craftsmanship. Roll the clay into an even slab and use circular, square, or hexagonal templates to cut matching shapes. Maintaining consistent thickness ensures that every coaster dries evenly and performs effectively. Add surface patterns by pressing textured materials into the clay or carving simple geometric lines. Smooth every edge carefully before drying to achieve a professional appearance. After the coasters harden completely, sand rough sections and apply paint if decorative color is desired. Finish each piece with a protective coating suitable for decorative use. These handmade coasters fit modern design themes while protecting furniture surfaces from scratches and moisture. They also encourage attention to detail because consistent sizing, clean edges, and balanced decoration contribute significantly to the finished appearance. The project remains accessible for beginners while producing attractive home decor.
Idea 6: Clay Photo Frame Decoration
How to Create
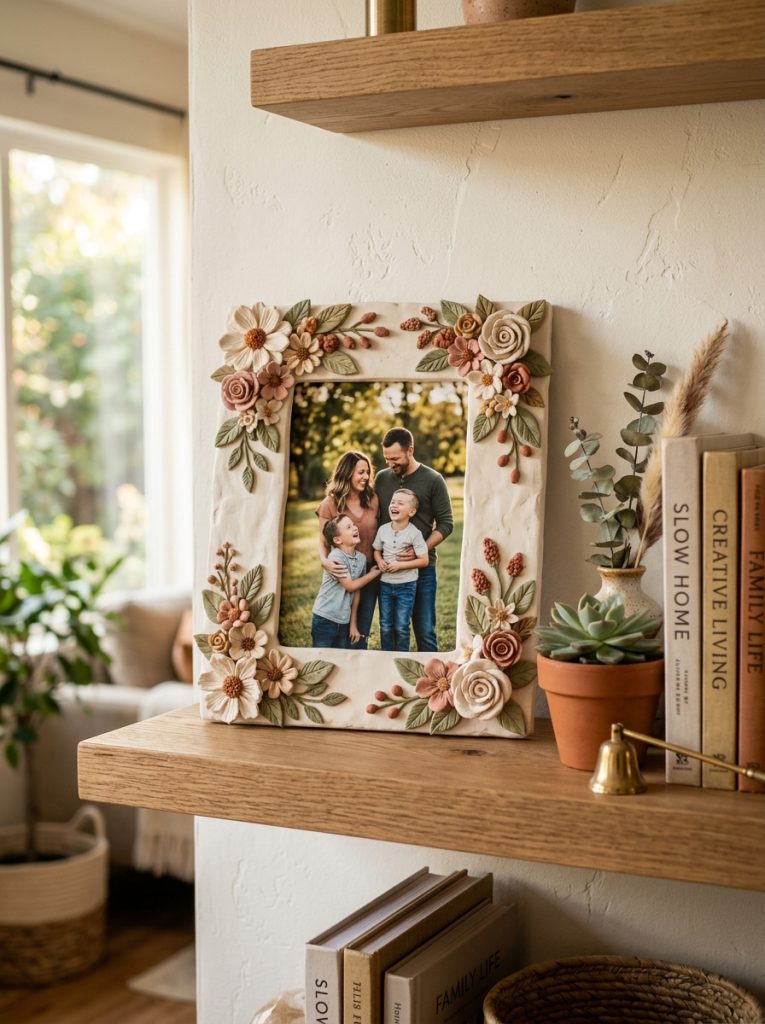
Decorating a simple photo frame with handmade clay embellishments creates a personalized display suitable for many interior styles. Begin by designing small decorative elements such as flowers, leaves, abstract shapes, or geometric pieces. Roll and shape each component individually before arranging them around the frame to establish a balanced composition. Texture can be added using sculpting tools or natural objects to create greater visual depth. Allow every decorative piece to dry completely before attaching it securely to the frame with suitable adhesive. Paint the finished design in soft neutral tones or maintain the natural clay appearance for a minimalist aesthetic. This DIY tutorial introduces beginners to small-scale sculpting while encouraging thoughtful planning and composition. The completed frame becomes both practical and decorative, highlighting photographs with handmade details that reflect creativity without requiring advanced sculpting techniques.

Idea 7: Stylish Clay Ring Holder
Step-by-Step Guide
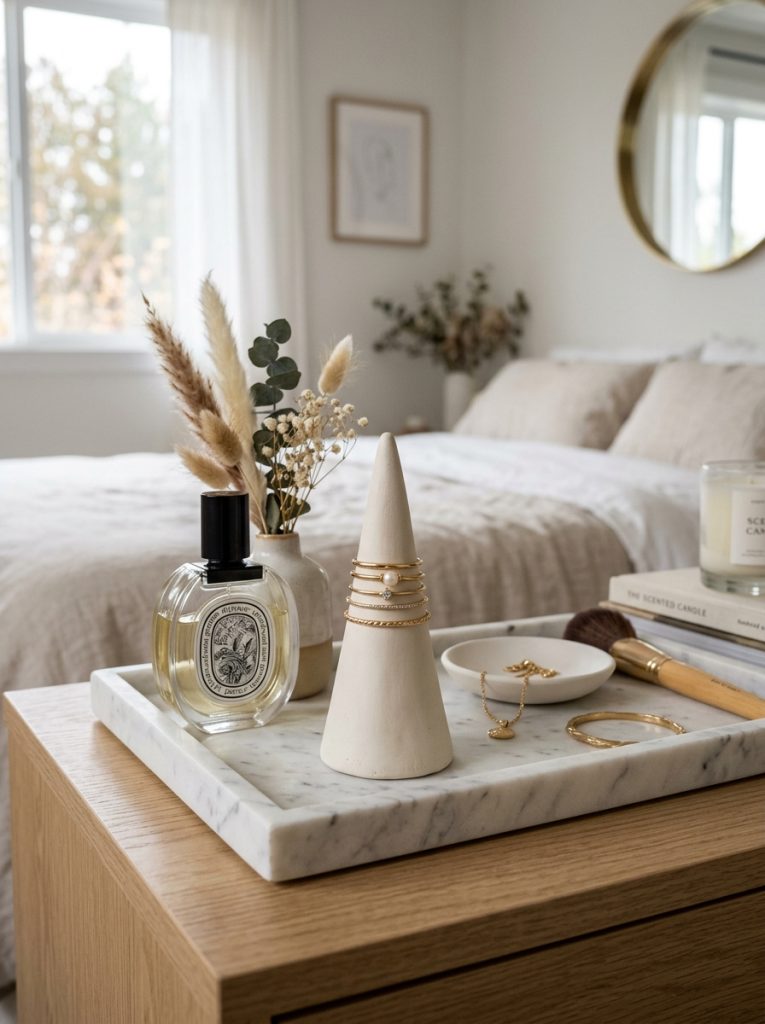
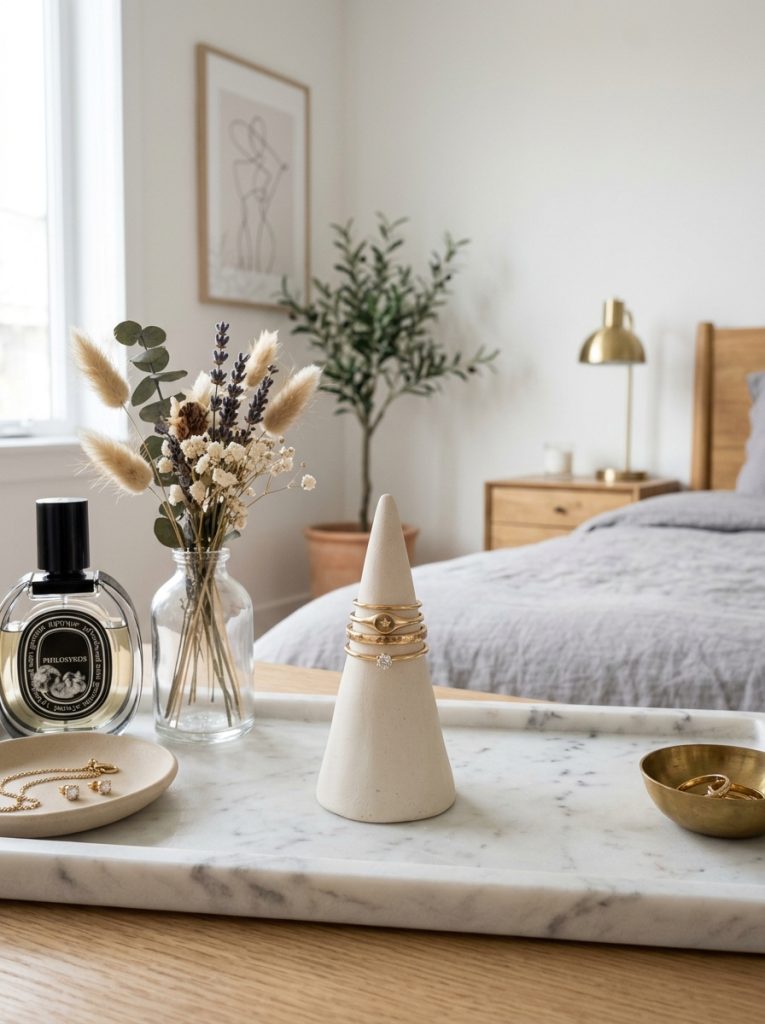
A clay ring holder offers an attractive organization solution for jewelry while serving as an elegant decorative accessory. Form a sturdy circular base by rolling and flattening the clay evenly. Shape a smooth cone separately, ensuring the base remains wide enough to support multiple rings without tipping. Blend the cone securely into the base using gentle pressure and small amounts of water to strengthen the connection. Refine the surface until all visible seams disappear. Decorative textures or engraved patterns can be added before drying to enhance visual interest. Once completely dry, sand rough areas carefully and apply paint if desired. The finished holder organizes rings neatly while complementing modern home decor with its simple design. This easy project helps beginners practice smooth shaping, structural stability, and proportion while creating a useful handmade item that fits neatly on dressers, shelves, or bedside tables.

Idea 8: Decorative Hanging Ornaments
How to Make
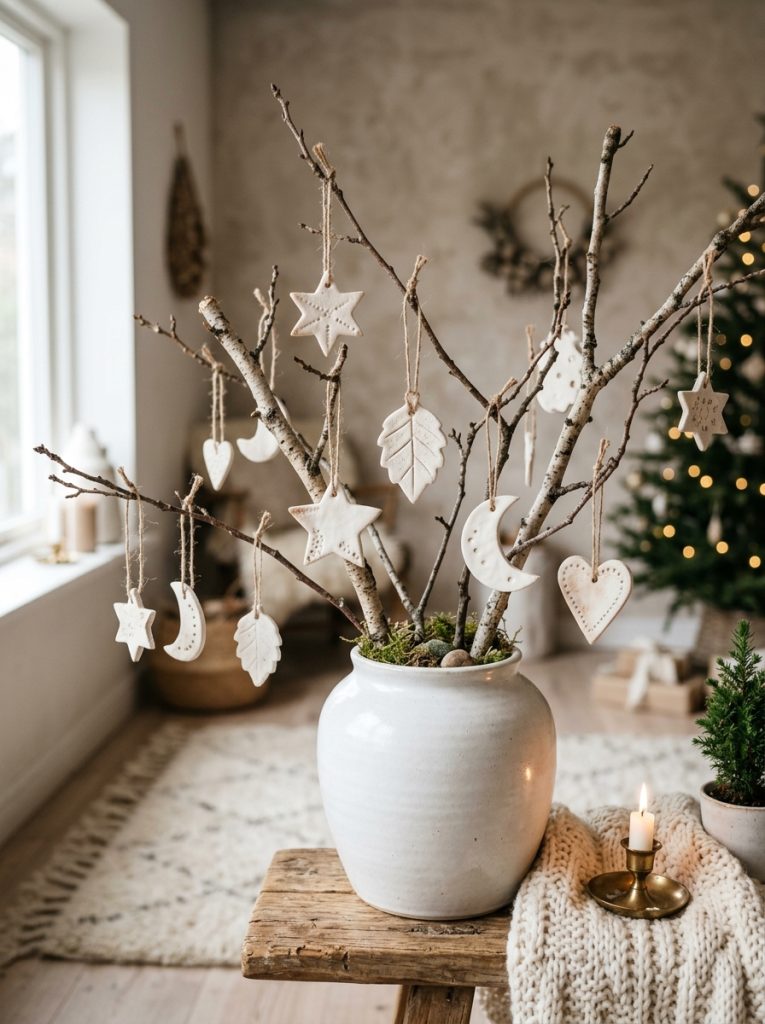
Decorative hanging ornaments provide endless opportunities for seasonal or everyday decoration while remaining simple enough for beginner friendly crafting sessions. Roll the clay evenly before cutting shapes such as stars, circles, hearts, leaves, or abstract forms. Press textured materials gently into the surface to create distinctive patterns that remain visible after drying. Punch hanging holes before allowing the ornaments to harden naturally on a flat surface. After drying, refine the edges with sandpaper and decorate the surfaces using painted details or minimalist line designs. Thread natural cord through each opening to prepare the ornaments for display. These handmade decorations work well on walls, shelves, decorative branches, or gift packaging while adding creative charm throughout the year. The project encourages experimentation with shapes, textures, and arrangement, making it an excellent source of inspiration for expanding DIY skills.
Idea 9: Functional Desk Organizer Tray
Execution Process
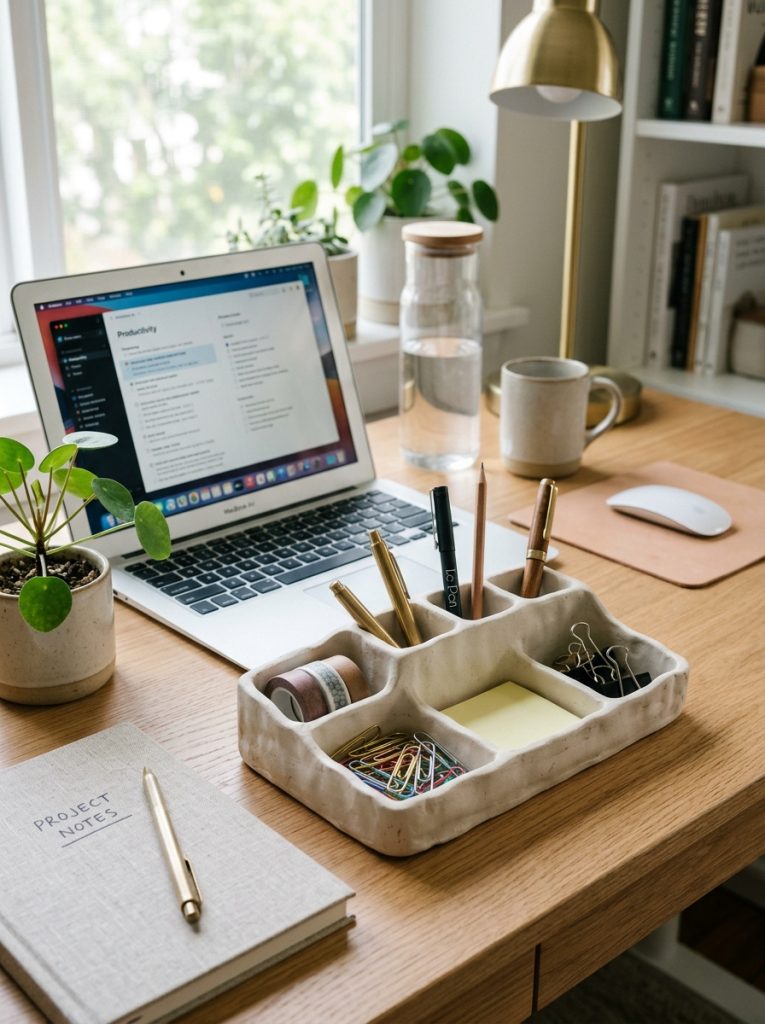
A handmade desk organizer tray combines organization with modern design by providing an attractive location for everyday office supplies. Roll a large slab of clay and cut a rectangular or oval base according to the intended size. Fold the edges upward carefully to create shallow sides while smoothing every corner to strengthen the structure. Internal dividers can be added for separating paper clips, pens, or small accessories. Decorative line patterns or textured impressions create additional visual appeal without reducing functionality. Allow the tray to dry gradually before sanding all edges smooth. Optional paint finishes can coordinate the tray with surrounding workspace decoration. This creative project demonstrates how air dry clay supports practical organization while maintaining an attractive handmade appearance. Beginners develop valuable shaping techniques while producing a useful accessory that improves workspace efficiency and visual organization.
Idea 10: Sculpted Decorative Vase Cover
How to Create
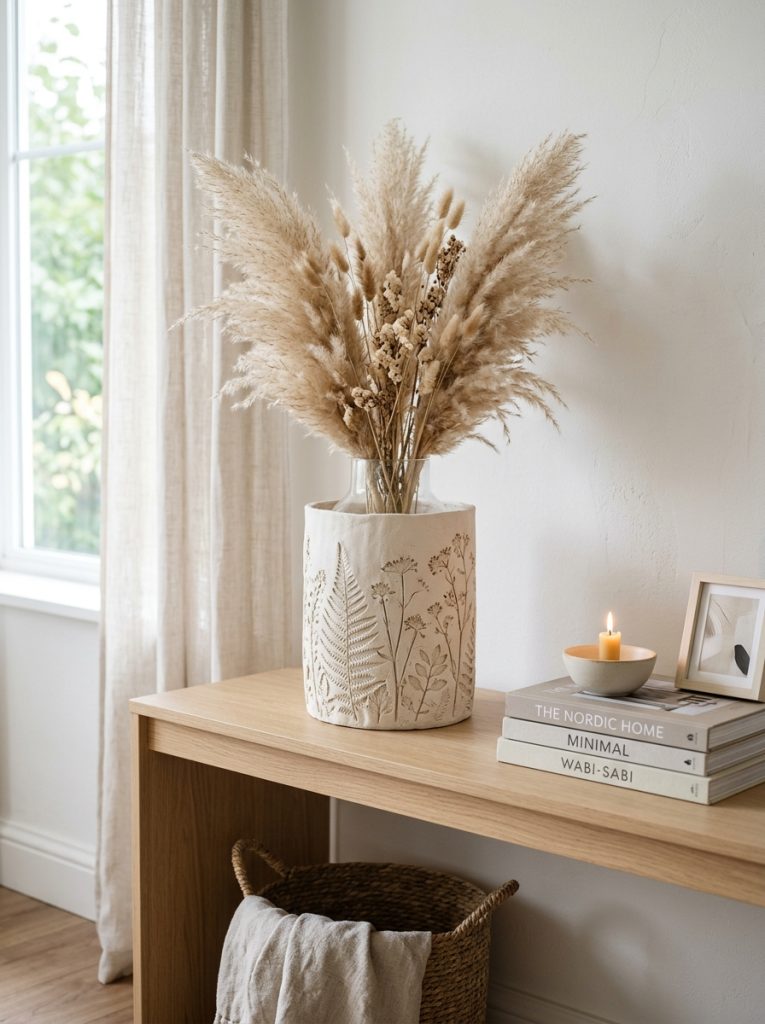
A sculpted vase cover transforms an ordinary container into a unique decorative centerpiece using simple clay techniques. Roll the clay into a uniform sheet and measure it carefully around an existing vase or container that serves as the support. Wrap the clay smoothly while blending the seam until it appears continuous. Add raised botanical patterns, carved textures, or subtle geometric details to create visual depth without overwhelming the design. Allow the clay to dry completely before removing it from the supporting container if appropriate. Sand rough edges carefully to achieve a refined finish before painting or preserving the natural surface. This project highlights the versatility of air dry clay while introducing beginners to larger sculptural forms. The completed decorative cover enhances floral arrangements and complements minimalist home decor through balanced proportions, handmade texture, and thoughtful planning.

Common Beginner Mistakes and How to Avoid Them
Many beginners experience avoidable problems because they rush important preparation or overlook drying requirements. Uneven clay thickness often causes cracking or warping during drying, so maintaining consistent thickness throughout every project is essential. Excessive water may weaken fine details, while insufficient smoothing leaves rough surfaces that require additional sanding later. Skipping the planning stage frequently results in uneven proportions or unstable structures. Allowing projects to dry too quickly can also increase the likelihood of cracks. Supporting delicate pieces during drying helps maintain their intended shape. Using simple templates improves accuracy, especially when creating matching items such as coasters or ornaments. Careful organization of materials before starting also reduces interruptions during shaping. Patience throughout every step contributes significantly to cleaner finishes, stronger structures, and more satisfying results for every creative project.
Practical Tips for Better Results
Consistent results depend on careful preparation, controlled shaping, and patient finishing techniques. Always knead the clay thoroughly before rolling to improve flexibility and reduce trapped air pockets. Rotate the clay regularly while rolling to maintain even thickness across the surface. Clean tools frequently to prevent unwanted marks from transferring onto finished pieces. Allow projects to dry on flat, stable surfaces away from direct sunlight or excessive heat. Light sanding after drying creates smoother edges and prepares the surface for decorative finishes. Test decorative textures on leftover clay before applying them to the final project. Keeping measurements consistent improves overall appearance, especially for sets or matching decorations. Organized planning and careful execution help transform simple materials into attractive handmade creations that reflect quality craftsmanship and thoughtful attention to detail.
Styling, Presentation, and Organization Ideas
Thoughtful presentation enhances the visual impact of handmade clay projects while helping them blend naturally into existing home decor. Group similar items together to create coordinated displays that emphasize consistent shapes and complementary textures. Neutral colors support minimalist style, while subtle decorative accents introduce personality without overwhelming the overall arrangement. Combine functional pieces such as trays, ring holders, and trinket dishes within organized spaces to improve both appearance and usability. Wall decorations become more effective when arranged in balanced compositions with equal spacing between elements. Handmade ornaments can be displayed on decorative branches or open shelving for year-round aesthetic appeal. Maintaining clean surfaces around displayed projects draws greater attention to their craftsmanship. Careful organization transforms individual DIY creations into attractive collections that provide lasting inspiration throughout different living spaces.
Budget and Time Planning
Air dry clay projects remain budget ideas because they require relatively few materials and many tools can be reused across multiple creative projects. Planning several items during one crafting session helps reduce material waste while improving efficiency. Smaller projects such as ornaments, plant markers, and trinket dishes often require only a few hours of active work, although complete drying takes considerably longer. Larger decorative pieces benefit from slower construction that allows each section to remain stable before additional shaping. Preparing sketches and measurements before opening the clay reduces unnecessary waste and simplifies execution. Organizing tools in advance also saves valuable working time. Dividing complex projects into manageable stages encourages better concentration while producing cleaner results. Careful planning allows beginners to enjoy creative activities without exceeding available budgets or personal schedules.
Creative Expansion and Advanced Inspiration
After mastering basic techniques, more advanced air dry clay projects become easier to explore through thoughtful experimentation. Combine geometric forms with organic textures to create unique decorative compositions that reflect evolving craftsmanship. Layer multiple clay components to build dimensional wall art or sculptural centerpieces while maintaining structural balance. Experiment with carved patterns, stamped designs, and raised details that add complexity without making construction difficult. Coordinated collections of matching trays, ornaments, and decorative containers create cohesive home decor themes suitable for different rooms. Sketching original concepts before beginning each project encourages stronger planning and more consistent execution. Revisiting earlier projects with improved techniques also demonstrates growing skill and confidence. Continued practice expands creative possibilities while reinforcing the value of careful preparation, organization, and step by step craftsmanship in every handmade project.